SSDT 16.5 Released part 2: Using the DacFx API and Samples!
Hello!
Yesterday I posted about the new release of SSDT from the SQL Tools Team at Microsoft. Two of the big changes are the ability to create the deployment report, deployment script and execute the deployment all in one command. The other change is that now for Azure two scripts are generated: one for any changes that need a connection to master, and the other script for changes to the user database. The samples yesterday showed how to execute the new method using SQLPackage, but a lot of people, myself included, have automated the deployment using the DacFx API through PowerShell. So today I am going to dig into how to utilise the DacFx API with the new changes. Also, because this stuff can be time consuming to set up and, I have posted a sample database on GitHub that has two PowerShell scripts to make use of the new deploy functionality: one for SQLPackage and one for DacFx. You can download these and take a look. If you’re familiar with using SQLPackage/DacFx they will be straightforward to follow.
But first, a little background; the way to currently generates the scripts and deploy is to call three separate methods:
- DacServices.GenerateDeployReport
- DacServices.GenerateDeployScript
- DacServices.Deploy
You can find documentation about these on MSDN. Calling these separately is fine, but there’s always a chance, no matter how slim, that the database can be in a different state when these are called. If they’re called immediately one after the other, well then that chance is pretty slim. But at any rate, the only way to have confidence in what was deployed being reported back is to have these three actions executed at once. And so this is why the new DacServices.Publish and DacServices.Script methods are now available. There’s a clear correlation between these methods and the options available in SQLPackage, in that dacservices.publish and dacservices.script equate to /action: Publish and /action:script respectively. Both dacservices.publish and dacservices.script take three arguments:
- dacServices.publish(dacPackage, targetDatabaseName, options)
- dacServices.script(dacpackage, targetDatabaseName, options)
The first two are pretty self-explanatory, and are similar to the older methods pointed out above. But the options requires a little more explaining. At first I thought it might be something along the lines of the argument dacprofile.deploymentoptions also used in the older methods above. But in fact it is a class in its own right with a set of properties that need to be configured before calling the method. Below is a screenshot form the PowerShell available in the sample database.
So we have options to set whether we want the deployment script and the deployment report generated, the output of the deployment scripts generated, and finally we set out dacprofile.deployoptions. So when we call the publish/script methods, the deployment options are passed in this way. But what really stands out is that there’s no way to set the path of the deployment report generated: both options are for the master and user database scripts. It’s not really a pressing concern, as you can pipe the output to a file:
You can also do this with the $result.DatabaseScript/MasterDbScript property, but if they’re already set in the options there’s really no need.
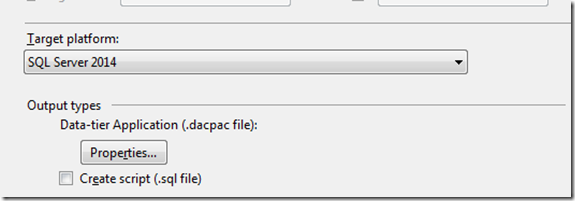
So, the sample database is available on GitHub. By default it is configured to build an Azure project, but this can be altered in the databaase properties:
There are two PowerShell scripts that are copied to the bin directory, along with the dacpac and the publish xml. One uses SQLPackage, the other DacFx. Open either and set the connection strings and whether you are deploying to Azure or not, and off you go. There should be no other changes.


